Fun & Messy Backyard Science Experiments for Kids This Summer
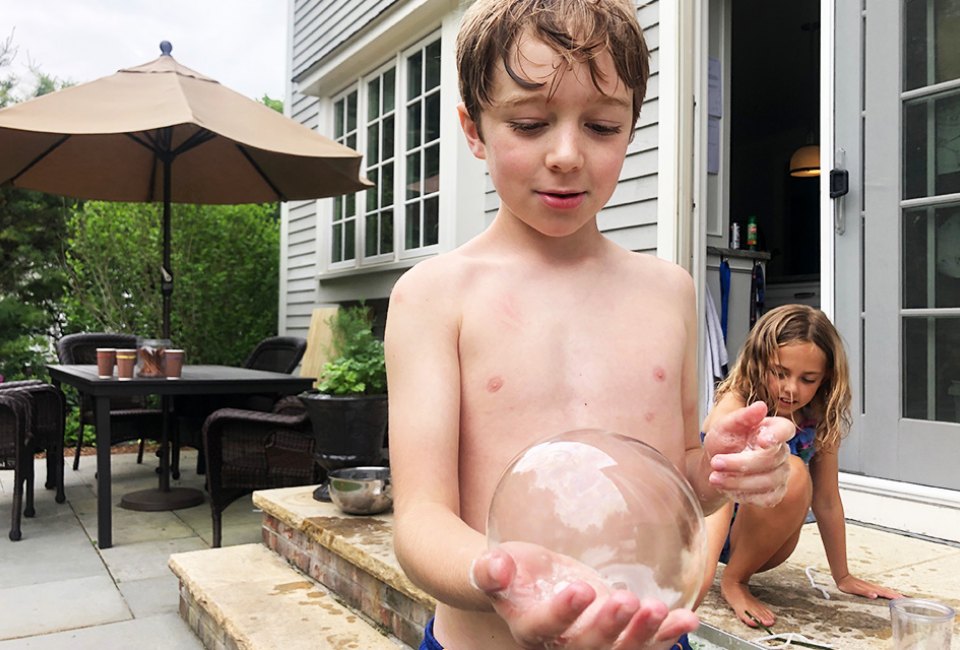
If we had to list our top parent-approved pastimes, backyard science experiments for kids are a hot contender for the #1 spot because kids have fun learning while soaking up a little vitamin D in the great outdoors. Instead of your house becoming the lab, with these 15 messy science experiments, all that measuring, mixing, and tinkering can take place on the grass, driveway, or a stretch of sidewalk.
Kids can learn to harness the power of the sun or water, and learn concepts ranging from molecular chemistry to basic physics in these outdoor science activities for kids. Several experiments are easy enough for even young children to do independently, but parents might want to get in on the (re)action, too! Find more science activities for kids in our STEM Guide for Kids , our big list of science experiments to do at home , and loads more summer fun on our Ultimate Summer Bucket List Ideas with 100 (Mostly) Free Outdoor Games and Activities for Kids .
Why Backyard Science Experiments Are Perfect for Summer
Outdoor science experiments for kids are an ideal summertime activity because, even though they tend to be messier than activities you’d do inside, kids benefit from both spending time in the sun and engaging with the natural world. And, any experiment you do outside is going to be fun! Think bouncy bubbles, exploding volcanoes, fizzy chalk fireworks, and plenty of water play.
Even better, these messy science experiments give your kids’ brains a workout because all the hands-on learning feels like playtime while they’re still making hypotheses, learning about cause and effect, and all sorts of educational facts.
Tips for a Successful Summer Science Day
Setting up outdoor science activities for kids requires a decent amount of prep, but it’s worth the effort. Have all your supplies ready: think baking soda, water balloons, vinegar, towels, food coloring, plastic bags, a water source, spray bottles, and more. Designate a safe space for your kids’ experiments, whether on a patio, the lawn, or the driveway.
Another important tip is to check for any safety concerns surrounding their chosen outdoor science activity. Will the vinegar and baking soda burn if they get into their eyes? Does a solar stove get hot enough to burn little fingers? These are things to consider before letting your kids start a messy science experiment.
]
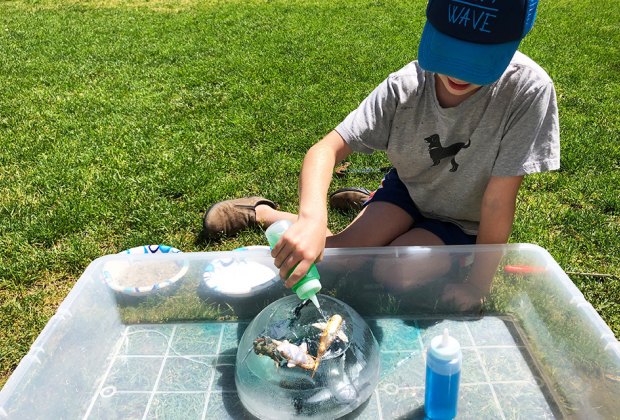
Kids will have a blast exploring the different ways to melt ice as they rescue ocean animals.
Best Summer Science Experiments and Science Activities
1. Frozen Ocean Rescue
Sea creatures are counting on your kid! Freeze a handful of toy marine animals (or any other small figurines) in a bowl of distilled water for a frozen ocean rescue .
Materials needed: Medium-sized bowl, distilled or boiled water, four or more small toys (marine animals are great, but action figures or Lego minifigures work well, too), table salt and/or ice cream salt, squeeze bottles or cups filled with warm water, and blue and/or green food dye (optional).
What to do : Freeze bowls of water overnight. When ready, have your kids go outside with the ice blocks, one or two different types of salt, some warm water (dyed blue or green makes for some spectacular colors), and the squeeze bottles or cups of warm water to see if they can warm the ice enough to rescue the trapped creatures.
What’s the science? When water freezes, it becomes less dense and floats atop its liquid form. This is how marine life can survive under icebergs.
Ages: 3 & up
IYKYK: A cold science experiment is perfect for the hottest days of summer!
RELATED: Fun Science Experiments: Make a Lava Lamp with Kids
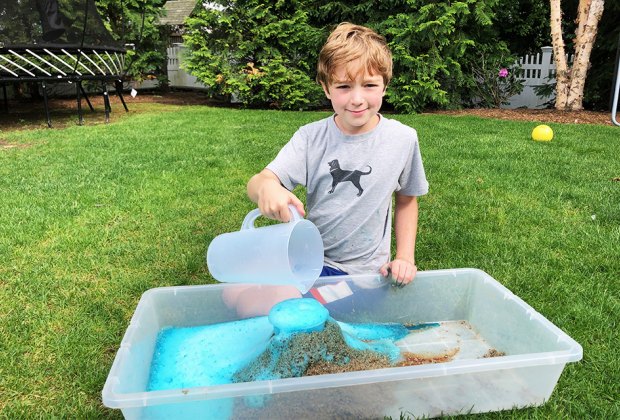
Take science outdoors and build a sandbox volcano in this classic science experiment.
2. Sandbox Volcano
Volcano science experiments for kids are always a crowd-pleaser, but eruptions can be even bigger and better when you make a sandbox volcano .
Materials needed: A sandbox or bag of sand in a large shallow plastic bin, a large cup or jar, baking soda, household vinegar, and food coloring.
What to do: Build a mound of sand around a right-side-up cup or jar, and then add a cup of baking soda mixed with a few drops of food dye into the open cup or jar. Slowly pour in vinegar to let the "lava" flow.
What’s the science? This experiment demonstrates the chemical reaction between baking soda (a base) and vinegar (an acid), which produces carbon dioxide gas.
Ages: 5-8
IYKYK: Kids should wear safety glasses or goggles, or stay back when the volcano is “erupting.”
3. Solar Oven S'mores
One of the tastiest backyard science experiments out there! It requires time and help from parents, but the payoff is delicious.
Materials needed: Pizza box, black paper, plastic wrap, aluminum foil, a stick, s'mores ingredients (graham crackers, chocolate bars, and marshmallows)
What to do: On a sunny and warm day, line a pizza box according to the dimensions outlined in this "recipe" for solar oven s'mores . Use a stick or long wooden skewer to prop open the box, place stacks of graham crackers, marshmallows, and chocolate inside, and wait a couple of hours for your s'mores to cook.
What’s the science? This fun outdoor summer science for kids demonstrates solar energy, heat transfer, and thermal expansion.
Ages: 4-8
IYKYK: Set up your solar oven on a black surface and aim at the sun to get higher temps.
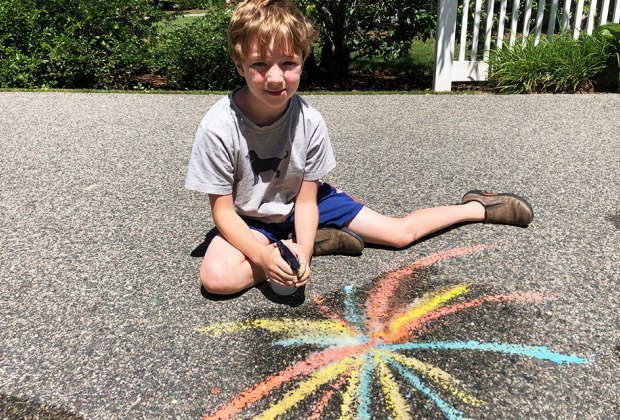
Make kid-friendly fireworks that fizz and pop.
4. Fizzy Chalk Fireworks
Kids can celebrate the 4th of July by painting fizzy chalk fireworks on the driveway, sidewalk, or street.
Materials needed: Baking soda, cornstarch, food dye, household vinegar, paintbrushes, and a spray bottle or squeeze bottle.
What to do: Mix baking soda, cornstarch, water, and food coloring to create liquid chalk that can be painted onto surfaces (smooth ones are best). Arm children with a spray bottle or squeeze bottle of vinegar to douse the fireworks!
What’s the science? This is another great way to help kids understand the reaction between an acid and a base.
Ages: All Ages
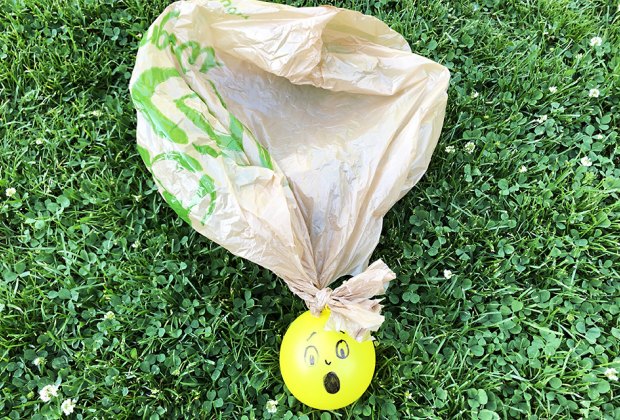
This fun activity is full of potential for scientific discoveries.
5. Water Balloon Parachutes
How can a water balloon survive a big drop? Strap a 'chute on it, of course! This water balloon parachute is one of the best outdoor science experiments for kids on a sunny day.
Materials needed: Small water balloons and thin plastic supermarket bags with handles.
What to do: Kids snip the handles of a plastic disposable shopping bag and knot all four remaining tabs around the neck of a water balloon for this backyard science experiment. Have them toss up a balloon without a parachute first (splat), and then a balloon with a parachute.
What’s the science? How air resistance works against gravity.
Ages: 5 & up
IYKYK: Drop other items, like small toys, to see how they perform alongside the water balloon parachute.
6. Exploding Watermelon
An exploding watermelon is one of the messiest backyard science experiments for kids that we could come up with for this summer!
Materials needed: Watermelon, 400-600 rubber bands, a bowl (to steady the melon), safety goggles, and an apron.
What to do: Put the watermelon on a steady surface. Place rubber bands around the center (probably around 400) until it starts to crack or leak. Have the kids continue to add rubber bands, but slowly. Eventually, it’ll explode (implode, more precisely)!
What's the science? Learning about the forces of internal and external pressure.
Ages: All Ages
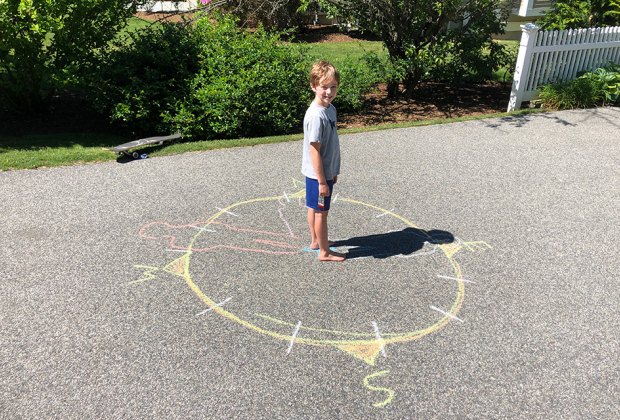
Experiment with shadows and timekeeping by making a human sundial.
7. Human Sundial
Show kids how shadows tell time with a human sundial , one of the most hands-on science experiments for kids.
Materials needed: Chalk and a compass.
What to do: Draw a chalk circle in a spot that receives sun all day. Mark cardinal directions around the edge. Have a child stand in the middle around 9am, around noon, around 3pm, and 6pm. Trace the outline of their shadows and record the time in chalk. Discuss why the shadow has moved and gotten shorter or longer over the day.
What’s the science? Learning about how the Earth rotates and how a shadow is related to the sun’s position in the sky.
Ages: 6-11
IYKYK : Choose a very sunny day and a wide open space!
8. Water Pump Sprinkler
This fun backyard science experiment cools off hot little feet!
Materials needed: a straw, a wooden skewer, tape, and a cup of water.
What to do: Push a skewer through the center of a straw. Bend and tape the sides of the straw into a triangle, but don’t cover any of the openings in the straw. Drop the straw/skewer device into a cup of water and spin it rapidly. It will spray water just like a sprinkler. Check here for more details .
What’s the science? It teaches kids about centrifugal force.
Ages : 3-13
IYKYK: Always supervise children around sharp objects.
RELATED: Science Experiment for Kids: Make Soap Silly Putty
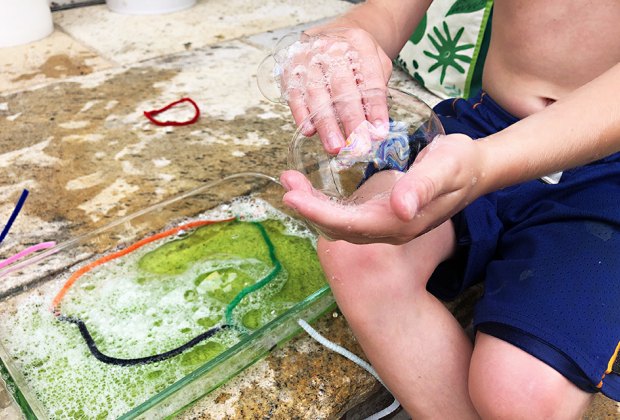
This bubble recipe makes bubbles strong enough that kids can catch or bounce.
9. Bouncy Bubbles
Bubbles are fun on their own, but mixing in corn syrup or glycerin (or both) and leaving the solution to "rest" for a couple of hours makes for super-fun bouncy bubbles that resist popping.
Materials needed : Dish soap (Dawn or Joy works best), corn syrup or glycerin, homemade bubble wands (twisted pipe cleaners work great, but so do straws or twisted coat hangers)
What to do: Pour three parts water, one part dish soap into a cup. Prep a second cup with three parts water and equal parts soap and glycerin or corn syrup. Combine and let the cups sit for a day. Dip bubble wands into the mixtures and blow!
What’s the science? Learning about the structure of soap and water and surface tension.
Ages: 3 & up
IYKYK: Using distilled water can create stronger bubbles.
10. Worm Tower
Yes, they may be gross, but nightcrawler worms can be fascinating to observe.
Materials needed: Clear vase or jar, dirt, sand, black paper, and nightcrawlers (dug up from the yard or purchased at a bait store).
What to do: Kids can make a live worm tower by layering sand and dirt in a clear jar filled with nightcrawlers. Temporarily covering the jar with black paper will encourage the worms to create tunnels that can be seen through the clear glass or plastic.
What’s the science? This classic biology-based science experiment helps kids understand concepts like aeration and soil health.
Ages: 4 & up
IYKYK: Avoid direct sunlight and extreme heat, as this can kill the worms.
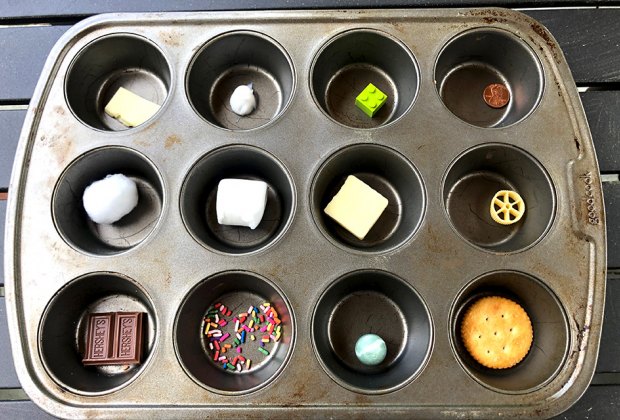
Grab a muffin tin and fill it with an assortment of objects. Discover which will melt in the sun.
11. What Melts?
Kids, especially little ones, will love to make predictions in this "What Melts?" experiment .
Materials needed: Muffin tin, a variety of non-melting and melting solid objects (like a cube of ice, a pat of butter, a crayon, a Lego brick, a marble, and so on).
What to do: On a very sunny and warm day, fill a muffin tin with a variety of solid objects, some of which will melt in the sun and some that won't. Have kids write down their guesses about which objects will melt and which will melt the fastest. Record the results.
What’s the science? Learning how to make predictions and hypotheses, as well as the concept of observation and comparison.
Ages: 6-10
IYKYK: Choose items that are easy to observe and visually stimulating. Think chocolate or bright colors.
12. Egg Drop
This classic backyard science experiment can make for a constructive, productive, and exciting afternoon.
Materials needed: Eggs, a variety of soft or protective materials (like blankets or towels, foam, straws, a shoebox, etc.), duct tape, and rubber bands
What to do: Give kids an egg, and depending on their age, give them (or have them round up) a variety of soft or protective materials to secure around it with duct tape or rubber bands. Position them on a ladder or second-story window for the egg drop experiment . Discover what breaks and what doesn't (and why).
What’s the science? Understanding how gravity, inertia, the principles of acceleration, and force interact.
Ages : 6 & up
IYKYK: Try this experiment on different surfaces to see how they change the outcome.
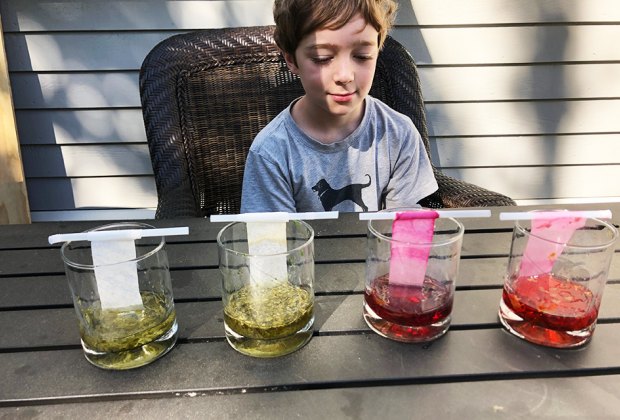
This leaf chromatography experiment reveals hidden colors in green leaves and lets you predict their fall colors.
13. Leaf Chromatography
This easy science experiment is also an art activity!
Materials needed: Clear glasses or jars, three to five different leaves (try for at least one non-green one, such as a red or Japanese maple), rubbing alcohol, one-inch strips of large, white "basket-style" coffee filters, straws, and tape
What to do: Drape coffee filter strips in a glass filled with crushed leaves and rubbing alcohol overnight, and kids can do a leaf chromatography experiment . The "hidden colors" in a leaf will creep up the paper strips.
What’s the science? Kids will learn about the separation of mixtures.
Ages: 8 & up
IYKYK: Fresh leaves are best as they have more pigments.
14. Leaf Transpiration
Leaf transpiration is not only cool summer science for kids, but also a great survival skill!
Materials needed: A Low, leaf-filled branch (intact on a tree), a plastic bag (a poultry cooking bag or dry cleaning works well), a twisty-tie or string, and a small rock
What to do: Tie a thin, clear plastic bag around a living tree branch, enclosing as many leaves as possible. Add a small rock to the plastic bag and secure it with the twisty-tie; leave it for 24 hours, and come back to see how much water was collected.
What’s the science? How leaves release water into the air.
Ages: All Ages
IYKYK: This works best on a hot, dry day with a well-watered tree.
15. Hose Rainbows
Even sunny days can produce rainbows—if you have a hose!
Materials needed: A hose with a nozzle that produces a fine mist setting
What to do: Spray a fine stream of water at different angles into the air to try to figure out how to catch a hose rainbow.
What’s the science? Discuss how (and why) water refracts light into different colors.
Ages : All Ages
IYKYK: This is a great water activity, so have the kids wear their suits!
Frequently Asked Questions About Backyard Science Experiments:
Are these experiments safe for all ages?
While these outdoor science experiments are safe for kids, some are more appropriate for older children.
What if we don't have all the supplies?
Some of the supplies can be swapped out, but it’s best to make a list of what you don’t have and buy them before planning to try some of these messy science experiments.
How can we extend the learning after the experiment?
You can go to the library to check out books on the subjects, watch YouTube Kids on parent-approved science channels, or find a different, more in-depth science experiment.
Photos by the author
Post a Comment